-
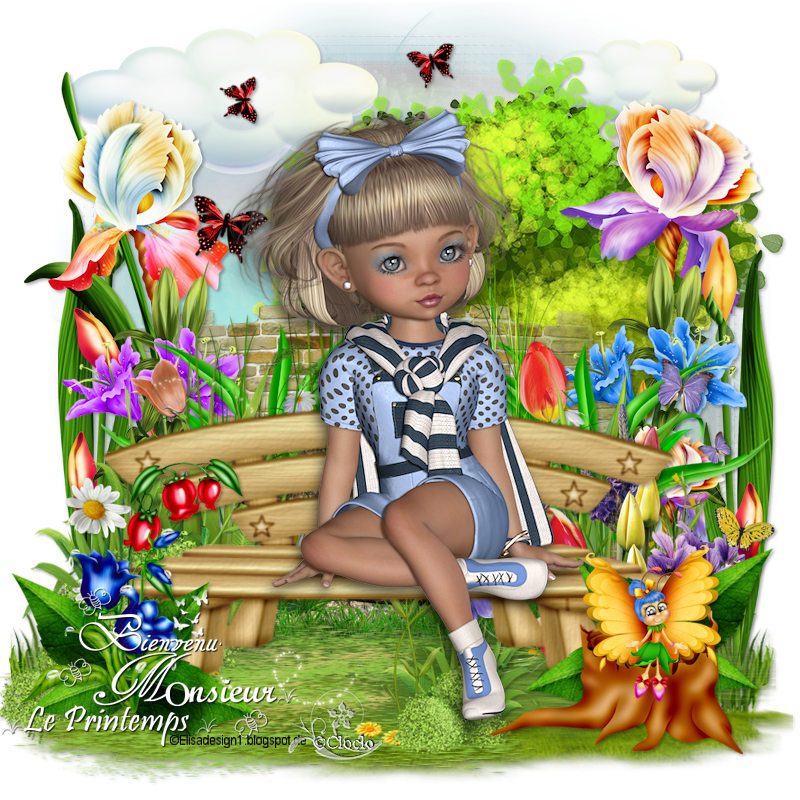
Welcome Mr. Spring


This tutorial was written by me
It is strictly forbidden to appropriate it
To copy and distribute it on the net without my prior authorization
The tubes used come from my different research on the web and are free of rights
This tutorial was realized with PSP 19 but maybe realized with a previous version
The tube is not attached in the tutorial it is a tube of Elisadesign
Winter day
----
Equipment
Winter day

1 --- Open a layer of 800 X 800 pixels transparent / Fill the black color that will be deleted at the end
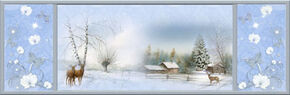
2 -File / Open tube background / Edit, Copy / Edit, Paste as a new layer
* Do not move
3 - File / Open tube ADU_108 / Edit, Copy / Edit, Paste as a new layer
* Place up to the right
Effects, 3D Effects / Drop Shadow / 2/2/30/4 / Black
4 - File / Open the tube: ADU_ 5 / Edit / Copy / Edit / Paste as a new layer
* Place down
Effects, 3D Effects / Drop Shadow / 2/2/30/4 / Black
5 - File / Open the tube: Stone wall / Edit, Copy / Edit, Paste as a new layer
* Go down slightly
Effects, 3D Effects / Drop Shadow / 2/2/30/4 / Black .... See final image
6 -File / Open the tube: ADU _ 10 +++ / Edit, Copy / Edit, Paste as a new layer
* Place on the right
Effects, 3D Effects / Drop Shadow / 2/2/30/4 / Black .... See final image
7-File / Open the tube: ADU_ 41 / Edit, Copy / Edit, Paste as a new layer * Place on the left
Effects, 3D Effects / Drop Shadow / 2/2/30/4 / Black .... See final image
8 - File / Open the tube: Cluster_1 / Edit, Copy / Edit, Paste as a new layer * Move slightly to the center
Effects, 3D Effects / Drop Shadow / 2/2/30/4 / Black / See final image
9 -File / Open the tube: Cluster_2 / Edit, Copy / Edit, Paste as a new layer * Place at the bottom right
Effects, 3D Effects / Drop Shadow / 2/2/30/4 / Black / See final image
10 - File / Open the tube: Butterflies / Edit, Copy / Edit, Paste as a new layer * Place on the top left
Effects, 3D Effects / Drop Shadow / 2/2/30/4 / Black / See final image
11 - File / Open the tube: Cluster_3 / Edit, Copy / Edit, Paste as a new layer * Place on the bottom left
Effects, 3D Effects / Drop Shadow / 2/2/30/4 / Black / See final image
12 - File / Open the tube: Bench / Edit, Copy / Edit, Paste as a new layer
* Place at the bottom in the center
Effects, 3D Effects / Drop Shadow / 2/2/30/4 / Black / See final image
13 - File / Open the tube: ADU_ 57 / Edit, Copy / Edit, Paste as a new layer /
* Place down
Effects, 3D Effects / Drop Shadow / 2/2/30/4 / Black / See final image
14 - File / Open the tube: ADU_ 67 ... 68 / Edit, Copy / Edit, Paste as a new layer
* Place lower right
Effects, 3D Effects / Drop Shadow / 2/2/30/4 / Black / See final image
15 - File / Open the tube: ADU_56 ... 149 / Edit, copy / Edit, paste as a new layer
* Place lower left
Effects, 3D Effects / Drop Shadow / 2/2/30/4 / Black / See final image
16- File / Open the tube: Wordart _CLaurette / Edit, Copy / Edit, Paste as a new layer ... Set to negative or other choice
* Place at the bottom left or at your convenience
17 - File / Open your custom tube / Edit, Copy / Edit, Paste as a new layer * Place in the center
Ombre worn at your choice
------
To see if everything is well placed / To put your signature / Or your license if you use a paying tube
Layer / Remove the black layer from the beginning / Then merge visible layers / Save as PNG
That's it finished
I hope you have a good time
See you soon
Here is a variant

Thanks to my friend Cloclo who tests my tutorial Scrap here is her version Her universe HERE
Send me your variants, I will be happy to add them to the gallery
For any problems please contact me below
Winter day
© C.Laurette: Tutorial 02 02 2019
-
Commentaires
Tutoriel Scrap de Laurette
-

-
-


-
TRADUCTEUR

-


-
Vos variantes ci-dessous


-
-


-
Les tutoriels Scrap de mon amie Cloclo

Mes versions ci-dessous sur le cœur

-
Les tutoriels Scrap de mon amie Maryse48

Mes versions ci-dessous sur le cœur
-
E-Mail


Bonjour joli blog je vais voir pour faire car c'est vraiment super
merci a vous
Monia59